Before You Start:
![]()
Have casting powders ready !
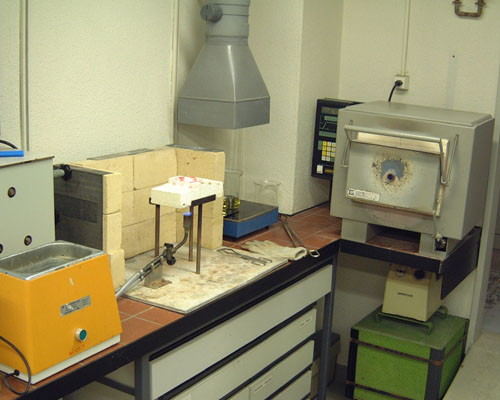
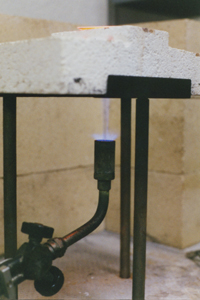
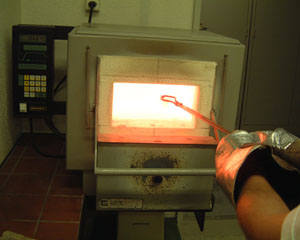
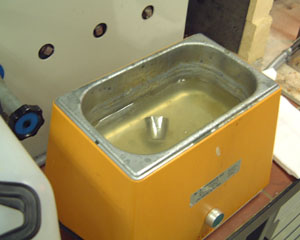
This is where we manually cast glass beads. From left to right:
Ultrasonic bath, Bunsen burner (shown with flame), small and large tongs with Pt tips, NOMEX-glove, acid bath on hot plate, programmable oven.
Never leave the gas on when you leave the room. There is an off switch for the main gas line in the door frame. Always wear a lab coat, safety goggles, and the appropriate gloves. Take Jewelery and watches off your hands, they conduct the heat very well. When you take the samples out of the oven, the metal heats up faster than your skin and that is where you get burns.
If the machine is down or in repair, glass beads have to be casted by hand. The Cons are the sweaty character of the work, the Pros the quick procedure, the fast cleaning of the thinner Pt crucibles, and the almost unlimited number of pills possible every day.
The sample powders are to be prepared exactly the same way as in the procedure for the automated casting. The thinner crucibles are numbered. Make sure that the ultrasonic bath is filled with water (level up to 3 cm below rim, see mark) and plug it in.
Place the powders in Pt/Au (95/5) crucibles into the oven and melt them during about 30 minutes at 1150°C. Li2B4O7 lowers the melting point to ca. 650-700°C, the melt is of low viscosity and can easily be homogenized by pioving. Sometimes, solid to viscous powder remnants stick to the inner walls. They have to be reunified with the melt. Tilt the crucible until the remnants are covered by melt and place it into the oven. Repeat this procedure until the inner walls are entirely free of remnants. If the melt still shows bubbles after 10 minutes, keep shaking the crucibles and leave them in the oven a little longer.
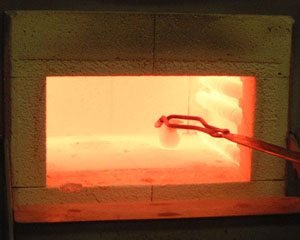
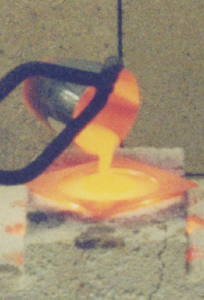
Remove the melt quickly from the oven and empty the crucible onto the casting dish.
Immediately put the crucible down, and adjust the casting dish to horizontal (note symmetric cooling patterns). If neccessary, tilt the dish a little so that the entire dish floor gets wetted equally.
Immediately switch off the gas (not the air) to let the melt quench (minimum 1 minute!).
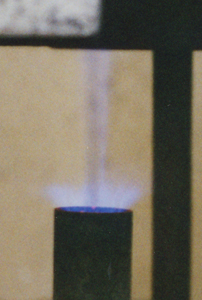
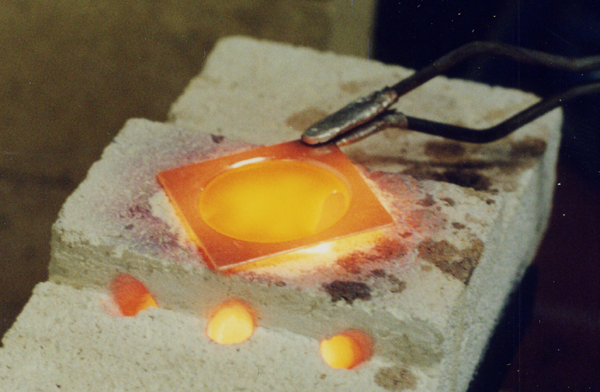
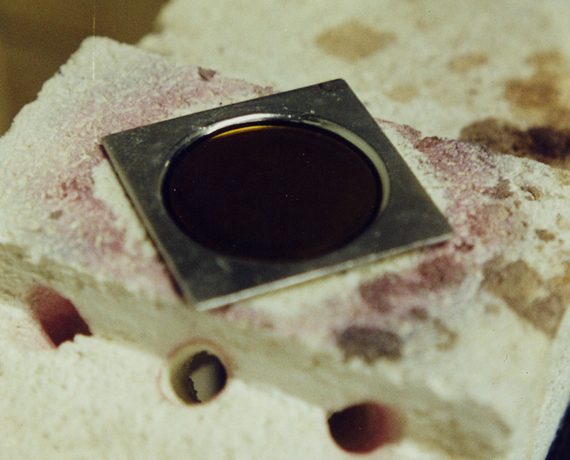
This is how the colour changes during cooling / quenching (click to enlarge); note the faintly visible convection cells in image 2:
1 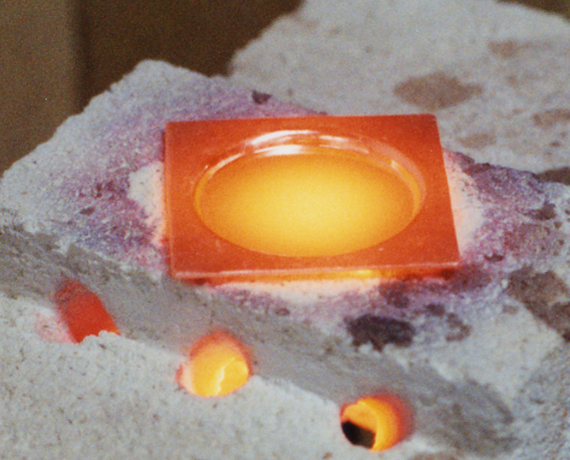
 2
2
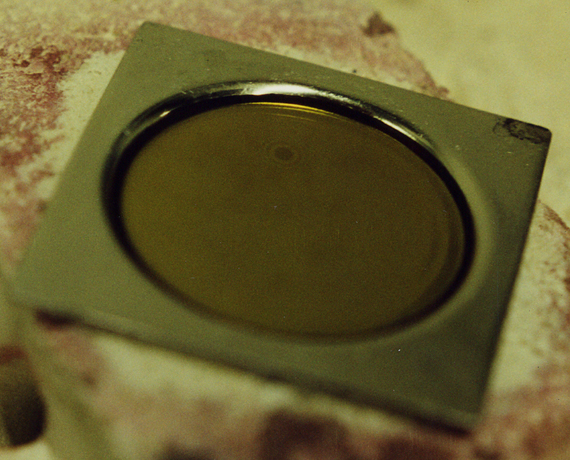
3 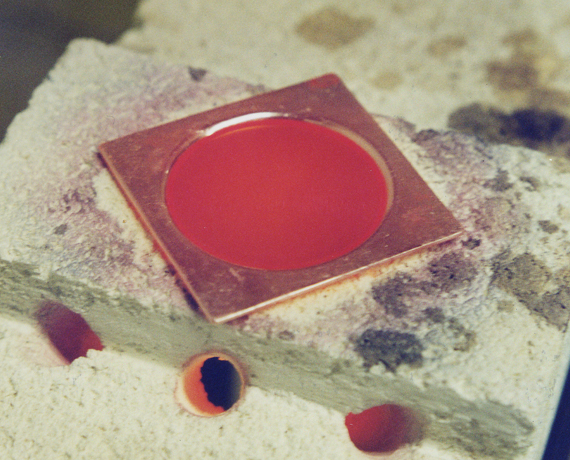
 4
4
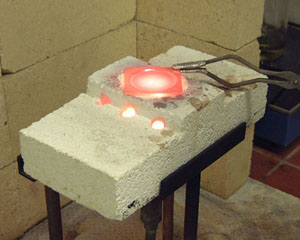
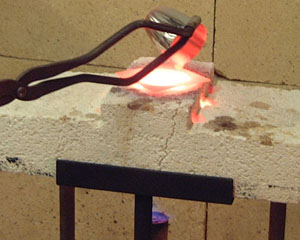
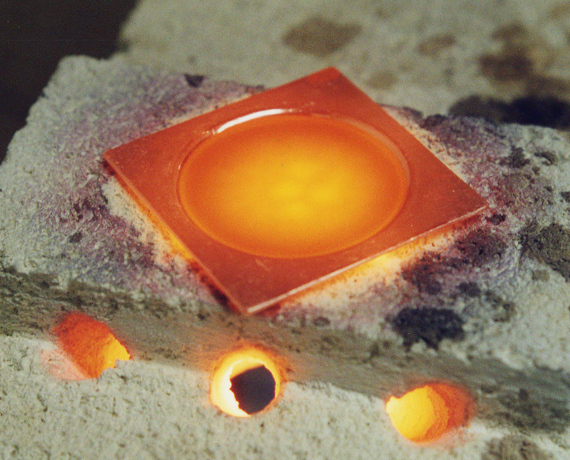
During the last stages of cooling, the bead contracts and a thin layer of air forms between the bead and the dish. The area that is still attached to the dish seems darker and its rims are characterised by concentric dark circles. At last, this area becomes very small and the bead can be removed.
This "spot" can be seen on the picture below, with concentric rings:
Once the glass is quenched and detaches from the dish (clicking noise), empty the dish onto a towel. The measurement side is the side that faced the dish and must not be touching the towel while still hot.
If the pill is not cracking, put the casting dish back on a small flame for a short time and turn over the casting dish on a towel. The pill should now unhinge without problems (dish spreads quicker than the pill).
If in the crucible is left too much of any melt remnant, put the crucible back into the oven for 10 minutes, heat it and rapidly quench it in the Ultrasonic bath. Never scratch the crucible inside!! After the ultrasonic bath, put it into the acid bath for a few minutes to clean it.
There are one-way round plastic containers and foam inserts in the lab. They can be used for bead storage. For longer storage times, keep them in a desiccators. The Li2B4O7 is strongly hygroscopic. For transport to EMPA, get a transport tray from the lab assistant
For casting glass beads by hand, one casting dish and several crucibles are handed out to the user. This is to ensure a continuous casting.
While casting another sample, the last used crucible is placed in warm (not boiling, ca. 80°C) hydrochloric acid (HCl 5%). 5 minutes are enough to clean the crucible if the antecedent program has been finished properly (this means, that the crucible has been shocked) and shortly placed in the ultrasonic bath. A hot plate (max. set dial to 6), glass beaker and acid are in the lab.
Under normal conditions of use, the casting dish doesn’t have to be cleaned by this procedure. It is only placed into the acid after the last sample for a few minutes. This is mainly to keep the lower side of the dish clean and reflective.
NEVER place the dish into the acid bath together with the crucibles! Their rims would scratch the inner casting surface of the dish.
If the room is left for any short time, switch the hot plate off and leave the platinum in the acid bath. As well switch the main gas supply off if you leave the room (in door frame, red button = OFF and green = ON)
Waste acid has to be poured into the white 10 L waste acid container next to the sink. Place container into the sink, unscrew top, pour waste acid in (GLOVES, SAFETY GOGGLES, LAB COAT!!!). If the container filling reaches the marked top level (ca. 10 cm below top), inform lab assistant for proper disposal. Do not pour waste acid into the sink. NEVER pour water into the waste acid container, explosion hazard!
Under no circumstances are the inner parts of the crucible or the casting dish ever to be touched by the tongs!! Even slightest contacts scratch the platinum surface. On these scratches, small melt drops remain, leading to lesser quality melts and contaminated glass beads. The platinum crucibles and/or dish would have to be replaced which takes a long time (>1 month) and is extremely expensive (depending on platinum price ca. 5000, - CHF per item!). After extensive use, the casting dish will deform to leave a convex surface on the analytical side of the glass bead. Scratches and uneven surface can be flattened and polished by about 4 hours work. Uneven surface leads to a defocused incident beam during analysis.
For pictures on how to handle the crucibles
and casting dish, see above.
The thicker crucibles and casting dishes for automated casting are handled in a different way.